giovedì 13 gennaio 2022

Execute python code directly from a raw link on Github

Like you have seen in the previous posts, in these days I'm working on a python script that can automatically download and calculate the numbers of the covid in Italy. 

I loaded this code to trinket so that anyone can try it in one click, but, I'm testing it and every time I made a fix I have to paste my code to a new trinket link and I have to upload it back to my blog.

To skip this step I thinked about to execute the code directly from the raw link of the script from my Github page.

I tryed severals code but the one that worked in my case was this:

# read the data from the URL and print it
import urllib.request
# open a connection to a URL using urllib
webUrl  = urllib.request.urlopen('https://raw.githubusercontent.com/Pymai73/bollettino_covid_giornaliero/main/bollettino_covid.py')

#get the result code and print it
#print ("result code: " + str(webUrl.getcode()))

# read the data from the URL and print it
data = webUrl.read()
exec(data)

You can edit the "exec" with a "print" if you don't want to run the code but you wanna only grab it. Make sure that the source of the code is reliable or preferable writed by you like in my case and remember always that you are executing code from an external source that can be changed from someone so be careful and do it also if your source is really reliable. I found the code above at guru99 website and like you can see I disabled with the # the code that get the confirm that the page have been founded and print it. If you need this confirm you can delete the # and reactivate the print ("result code: " + str(webUrl.getcode()))

If you wanna see the result you can take a look to the trinket frame here. The next time I will upload my code in my github Github page (Pymai73) the trinket frame will execute directly the new code without any manual update.

An alternative way with the urllib.request I founded at stackoverflow to retrieve all the code in a raw file uploaded online was this one:

# read the data from the URL and print it
#
import urllib.request

url = "https://raw.githubusercontent.com/Pymai73/bollettino_covid_giornaliero/main/bollettino_covid.py"
file = urllib.request.urlopen(url)

for line in file:
    decoded_line = line.decode("utf-8")
    print(decoded_line)

In this case the code will be printed to screen line by line but I haven't find a way to execute It directly because of some errors. I have to analize better the traceback. If someone have some idea how to edit this second code to execute it directly like the first one I will appreciate if you let me know in the comment section below.

This article is property of PC Wizard wroted by Michele (Italy). Please don't copy and paste without mentioning the blog and the author.

If you wanna help me donate here: https://www.paypal.com/donate?business=AUDLXGNQV6FAA&no_recurring=0&item_name=sostegno+del+blog+PC+Wizard&currency_code=EUR 

ore use the QR code:


lunedì 10 gennaio 2022

Riepilogo Bollettino Covid Regionale e Nazionale zona Italia

Riepilogo bollettino covid giornaliero regionale e nazionale per la zona Italia


Il programma per il riepilogo dei dati regionali ricalca il funzionamento del codice dei dati nazionali visto nel precedente post del 2 gennaio 2022. 

Prende il file CSV con tutti i dati regionali del giorno corrente, tramite pandas crea un dataframe, chiede all'utente quale regione scegliere e crea un nuovo dataframe con i soli dati della regione scelta per permettergli di estrarre i vari riferimenti di colonna (esempio: nuovi positivi). Il nome della regione inserito dall'utente viene fatto corrispondere al nome completo anche se digitato in maniera incompleta o solo per iniziale (esempio Giulia -> diventerà Friuli Venezia Giulia, P -> diventerà Piemonte, in caso di iniziali uguali per più regioni restituirà la prima regione con quella iniziale: M -> diventerà Marche). Se il nome della regione non viene trovato il programma lo segnala e chiede se si vogliono consultare i dati nazionali. Restituisce come risultati finali: nuovi positivi, numero tamponi, tasso di positività, ingressi in terapia intensiva e decessi. Questi dati vengono calcolati prevalentemente come differenze con il giorno precedente (tramite un secondo dataframe della regione prescelta creato senza intervento dell'utente).

I dati di partenza, come ricordato nel primo post sull'argomento, sono quelli ufficiali pubblicati dal repository del Dipartimento della Protezione civile. Il file aggiornerà i dati secondo gli orari pubblicati nella pagina sopra menzionata.

Ricordo che trovate la skill per Alexa per testarla in modalità dev nella mia pagina Github: Pymai73

Potete inserire l'output nel vostro sito tramite questo codice:

<iframe src="https://trinket.io/embed/python3/31d63d6ecd?outputOnly=true&runOption=run&start=result" width="100%" height="356" frameborder="0" marginwidth="0" marginheight="0" allowfullscreen></iframe>

 Per aggiornare i dati potete aggiornare la pagina premendo F5 oppure il tasto run sul frame Trinket.

Potete seguire il progetto nella mia pagina Github per futuri aggiornamenti: Pymai73

martedì 4 gennaio 2022

Create an Alexa Skill that will report the daily numbers of the covid in Italy


After the creation of the python script i decided to create an Alexa skill that can read to me the small report with the numers of the covid in Italy. The skill returns:   

  • the number of new positives,
  • the total number of swab test of the day,
  • the rate of positivity,
  •  new entrants to the hospital and
  • the numbers of deaths.

I haven't find any good skill that can do it so I decided to create it by myself. Like with the python script the data are those officials provided by the repository of Dipartimento della Protezione civile. The skill will update the data according to the data update of this department.

For the creation of the skill I used this tutorial youtube and I used the inventiveness to compile the rest.

To activate the skill you should say (the instruction are in Italy in my case):
Alexa, bollettino covid
or
Alexa, apri bollettino covid
or
Alexa, chiedi a bollettino covid il numero di tamponi

These are the main step to create the skill:

01. Open the website developer Amazon
02. Skill Builders
03. Develop your Skill
04. Create Skill
05. Custom


06. Alexa-hosted (Python)

07. Start from Scratch

08. Continue with template
09. Interaction Model -> Intents
10. Add Intent
11. Add all the Intents you need. Save Models

12. Repeat the process for the new positives, swab tests, decease, new entrants at the hospital and the rate of positivity
 

13. Build Model
14. Go to the "code" sheet

15. To insert the Intent we should copy and paste those already present in the pre build model (for example copy the "HelpIntentHandler" and edit it with the intent created by us in the "Build" sheet. I activated the ask function that will ask to the user if he want to know other data. If he will not respond the skill will terminate.


16. Add the "intenthandler" at the bottom of the page with the others "SkillBuilder" like in the image below


17. I pasted the python code of my script edited deleting all the prints (you can find the code on github Pymay73) and I have lightened the code

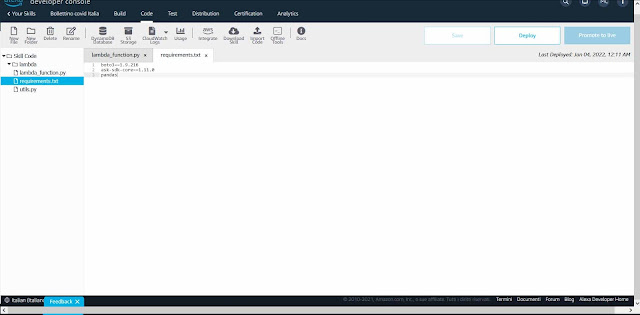
18. I competed the file "requirements.txt" inserting only pandas  because I discovered that all the other library used in my python code were natively included in the lambda function. For any libraries that aren't natively included in lambda you will need to populate "requirements.txt". For a list of libraries that are natively included please see: here

19. Test the code in the "Test" sheet

20. To make other changes you have to turn back to "Code" e "Build" sheets if you want to edit the Intents, the Slots or the Invocation phrase.

When you will switch from "Test" to "Code", for example, you will receive many times the "Scheduled Manteinance" message and you have to wait patiently for one minute before the page to be refreshable and to be able to edit the code again. I think this is a bug of the developer Amazon website. You will need a lot of patience.

These are the main steps. If you have more questions you can study the source code at my page on github Pymai73

This is a first version so it can be unstable and can not respond like you want sometimes. I accept advice in case of discovery of bugs.


Skill Alexa per avere il riepilogo del bollettino covid giornaliero italiano


Dopo la creazione dello script python ho deciso di cimentarmi nella creazione di una skill per Alexa che mi leggesse il piccolo report giornaliero con tutti i numeri del covid in Italia. La skill restituisce:

  • il numero di nuovi positivi,
  • il numero di tamponi totali della giornata,
  • il tasso di positività,
  • i nuovi ingressi in terapia intensiva e
  • il numero decessi.

Non avendo trovato alcuna skill che proponeva questi dati ho deciso di provare per la prima volta a scrivere la skill. Come per il file python anche i dati da cui parte la skill sono sono quelli ufficiali pubblicati dal repository del Dipartimento della Protezione civile. La skill aggiornerà i dati secondo gli orari pubblicati nella pagina sopra menzionata.

Per la creazione della skill ho utilizzato un tutorial youtube e dove non ho trovato nulla ho semplicemente ragionato fino a trovare una soluzione funzionante. 

Per attivare la skill basta dire:
Alexa, bollettino covid
oppure
Alexa, apri bollettino covid
oppure
Alexa, chiedi a bollettino covid il numero di tamponi

Ripropongo nel seguito i principali step della creazione della skill:

01. Aprite il sito developer Amazon
02. Skill Builders
03. Sviluppa la tua Skill
04. Crea Skill
05. Custom

06. Alexa-hosted (Python)

07. Start from Scratch

08. Continue with template
09. Interaction Model -> Intents
10. Add Intent
11. Aggiungo gli Intents. Save Models

12. Ho ripetuto il processo per i nuovi positivi, tamponi, deceduti, ospedalizzazioni e tasso di positività
 

13. Build Model
14. Andiamo su "code"

15. Per inserire gli Intent copiamo e incolliamo quelli già presenti (ad esempio copiamo quello del "HelpIntentHandler" e modifichiamolo secondo gli intent da noi specificati nella scheda "Build". Io ho attivato la funzione ask che chiederà all'utente se vuole sapere altri dati. Se l'utente non risponderà la skill terminerà

16. Aggiungi "intenthandler" a fondo pagina con gli altri "SkillBuilder"


17. Ho incollato il codice python dello script modificato cancellando i print (trovate il codice su github Pymay73) e l'ho modificando alleggerendolo un poco

18. Ho completato il file "requirements.txt" inserendo solo pandas perché ho scoperto che le altre librerie da me usate nel codice python erano già nativamente incluse nel lambda function. Per tutte le librerie non nativamente incluse nel lambda dovrete popolare il file "requirements.txt". Per conoscere la lista delle librerie nativamente incluse potete vedere qui

19. Testiamo il codice sulla scheda "Test"

20. Per effettuare modifiche torniamo alla scheda "Code" e "Build" se le modifiche riguardano gli Intent, gli Slot o la parola di invocazione.

Quando cambierete la scheda da "Test" a "Code" ad esempio riceverete molto spesso il messaggio "Scheduled Manteinance" e dovrete attendere circa un minuto prima di rifreshare la pagina e poter riprendere con le modifiche al codice. Purtroppo è da parecchio che riscontro questo bug nel sito dei devoloper amazon. Quindi dovrete avere pazienza.

Questi sono gli step principali. Se avete dubbi potete consultare il codice sorgente sulla mia pagina github Pymay73

Essendo una prima versione potrebbe non funzionare sempre a dovere e accetto consigli in caso di scoperta di bug.


domenica 2 gennaio 2022

Riepilogo Bollettino Covid Giornaliero scritto in Python

Riepilogo bollettino covid giornaliero per la zona Italia

Esordisco dicendo che non sono un grande esperto di python ma ho deciso di condividere questo semplice programma che eseguito giornalmente restituisce il numero di nuovi positivi, il numero di tamponi totali della giornata e il tasso di positività. L'ho creato perché da molti mesi cercavo giornalmente questi tre dati sul web e così ho deciso di automatizzare e semplificare la consultazione.

I dati di partenza sono quelli ufficiali pubblicati dal repository del Dipartimento della Protezione civile. Il file aggiornerà i dati secondo gli orari pubblicati nella pagina sopra menzionata.

Ho iniziato questo percorso con la speranza di poter creare una skill per Alexa che possa leggere l'output delle ultime tre righe del codice: nuovi casi, tamponi, tasso di positività ma non essendo un grande esperto e non avendo trovato una guida nemmeno in lingua inglese che possa aiutarmi step by step nella creazione, spero qualcuno con le competenze giuste voglia darmi qualche suggerimento o qualche guida da seguire.

Potete inserire l'output nel vostro sito tramite questo codice:

<iframe src="https://trinket.io/embed/python3/31638994ed?outputOnly=true&runOption=run&start=result" width="100%" height="356" frameborder="0" marginwidth="0" marginheight="0" allowfullscreen></iframe>

 Per aggiornare i dati potete aggiornare la pagina premendo F5 oppure il tasto run sul frame Trinket.

Potete seguire il progetto nella mia pagina Github: Pymai73

venerdì 17 settembre 2021

Procedura per proiettare il Samsung Galaxy A7 (2018) con display rotto su una Smart TV

  In questi giorni ho ricevuto un Samsung Galaxy A7 (2018) con schermo completamente rotto da mia cugina e mi ha chiesto di recuperarle le foto presenti nella memoria interna. La modalità "debug on usb" non era attivata e il costo di un nuovo display di buona fattura non era conveniente visto la quotazione dello smartphone sul mercato dell'usato, così mi sono inventato una procedura per recuperare i dati visto che i vari tutorial online e i video su youtube non capivano cosa significa "schermo rotto" e continuavano a richiedere operazioni da eseguire sullo smartphone ma ciò era impossibile. Non essendoci una guida ho deciso di scriverla io per aiutare chi come me si trova in questa situazione. La guida funziona solo su detto smartphone ma con le dovute modifiche (facendo test su smartphone identici a quello rotto) può essere utilizzata anche per altri smartphone. 

Il Samsung Galaxy A7 (2018) SM-A750FN non ha l'uscita video mhl tramite cavo HDMI quindi l'unico modo per proiettarlo sulla Smart TV è usando l'applicazione Samsung Smart View.

Inizialmente ho provato ad attivarla direttamente ma con scarso successo e così ho deciso in via preventiva di attivare Talkback dal menu delle impostazioni e dopo, tramite l'aiuto vocale, di attivare Smart View.

La procedura per attivare Talkback sul SM-A750FN con Android 10 è questa:

1. Connetti la tastiera allo smartphone

2. Doppio invio

3. Se c'è un pin inseriscilo e premi invio

4. Esc X 2 volte per essere sicuri di essere nalla home (potete anche premere WIN+D per richiamare la home)

5. ALT+A

6. Su

7. Invio

8. Scrivete: Impostazioni

9. Invio (e aspettate 3 o 4 secondi)

10. Giù

11. Invio

12. Giù (pressione lunga per 5 secondi -> stiamo andando in fondo al menu impostazioni)

13. Su X 3 volte (4 volte se avete attivato la modalità sviluppatore)

14. Invio

15. Giù

16. Invio

17. Giù

18. Invio

19. Tab X 2 volte

20. Invio

A questo punto dovreste sentire la voce dell'assitente Samsung Talkback che vi aiuterà a muovervi nei menu di sistema senza vedere il display. Se non sentite la voce dell'assistente ripetete la procedura più volte ricominciandola dall'inizio oppure premendo WIN+D per tornare direttamente alla home.

Adesso possiamo passare all'attivazione del screen mirroring sulla Smart TV Samsung con l'aiuto di Talkback.

La procedura per attivare Smart View sul SM-A750FN con Android 10 è la seguente (ci sono molti altri modi di attivarlo ma noi necessitiamo di un modo schematico e preciso per poterlo esegire con la sola tastiera del PC avendo un display completamente rotto):

1. Controllare di avere la tastiera connessa allo smartphone

2. Doppio invio

3. Se c'è un pin inseriscilo e premi invio

4. Esc X 2 volte per essere sicuri di essere nalla home (potete anche premere WIN+D per richiamare la home)

5. ALT+A

6. Su

7. Invio

8. Scrivete: Smart View

9. Invio (e aspettate 3 o 4 secondi)

10. Giù X 3 volte

11. Invio

12. TAB X 5 volte (ed aspettate almeno 5 secondi)

13. Invio

14. Giù

15. Invio

16. Giù

17. Invio

Se tutto è andato per il verso giusto dovreste essere connessi allo smart tv dopo aver premuto il pulsante di autorizzazione sullo stesso (ho provato con due differenti smart tv Samsung ed ha funzionato su entrambe. Se avete problemi seguite la voce dell'assitente talkback per capire cosa state facendo e in che parte del sistema siete in quel momento. Non scoraggiatevi se non ci riuscite ai primi 3 o 4 tentativi e provateci fino a riuscirci.

Adesso che siete connessi alla TV rimuovete il PIN (se come nel mio caso ne avevate uno impostato) e attivate la modalità sviluppatore (per le emergenze o per poter utilizzare ADB) cliccando o premendo invio 7 volte sopra la build version sulle informazioni di sistema.

Questo articolo è proprietà di PC Wizard scritto da Michele C. (Italy). Cortesemente non copiate e incollate la guida senza menzionare il mio blog e l'autore.

I wrote an english version of this guide and you can find it here: https://pcwizard-italia.blogspot.com/2021/09/procedure-for-project-samsung-galaxy-a7.html

Vi lascio alcune utili scorciatoie da tastiera per il Samsung Galaxy A7 (2018) SM-A750FN:

WIN+N abbassa parzialmente il menu delle notifiche

WIN+Q abbassa tutto il menu delle notifiche

WIN+? mostra alcune scorciatoie da tastiera

WIN+D schermata home

WIN+V mostra la barra del volume

 Vi avviso che alcuni altri smartphone (con android 11 nel mio caso) hanno delle shortcut da tastiera aggiuntive. Per esempio WIN+Y su un Samsung Galaxy S10 e un Samsung Galaxy A40 apre direttamente l'app Smart View ma questa scorciatoia non funziona sul Samsung Galaxy A7 2018. Un'altra scorciatoia che funziona su questi smartphone con Android 11 è WIN+U che apre direttamente il menu Accessibilità ma allo stesso modo non funziona su Samsung Galaxy A7 2018.

Questo articolo è proprietà di PC Wizard scritto da Michele C. (Italy). Cortesemente non copiate e incollate la guida senza menzionare il mio blog e l'autore. 

I wrote an english version of this guide and you can find it here: https://pcwizard-italia.blogspot.com/2021/09/procedure-for-project-samsung-galaxy-a7.html

Se volete aiutarmi con il blog fate una donazione qui

oppure usate il QR code: 


Procedure to mirror a Samsung Galaxy A7 (2018) with a broken display on a Smart TV

 In these days I received a Samsung Galaxy A7 (2018) with a broken display from my cousin and she wanted me to recover his photos. The photos were in the internal memory, the debug on usb was not activated and the cost of a new display wasn't convenient so I invented something to try to recover the data. 

The Samsung Galaxy A7 (2018) SM-A750FN doesn't have the mhl to project it to a tv with the HDMI so the only chance for me was to project the display to a Smart TV using the Samsung Smart View tecnology.

First I tried to activate it directly but it result really hard so in the second place I decided to activate Talkback from the settings menu and after to try to activate Smart View.

The procedure for activate Talkback in a SM-A750FN with Android 10 is this:

1. Connect a keyboard to the smartphone

2. Double Enter

3. If there is a pin insert it and push enter

4. Escape X 2 times to be sure to be at the Home screen

5. ALT+A

6. Up

7. Enter

8. Type: Settings

9. Enter (and after wait 3 or 4 seconds)

10. Under

11. Enter

12. Under (long pressure for 5 seconds)

13. Up X 3 times (4 times if you have dev options on)

14. Enter

15. Under

16. Enter

17. Under

18. Enter

19. Tab X 2 times

20. Enter

At this point you should definitely heard the voice of the Samsung Talkback helping you to move on the system without seeing the display. If it don't happened try it again many times and wait one seconds moving to a step from another.

Now we can pass to activate the screen mirroring to the samsung Smart TV with the help of Talkback.

The procedure for activate Smart View in a SM-A750FN with Android 10 is this (there are many ways to activate it but we need the one that we can do with only a keyboard in a completely broken display): 

1. Be sure to have a keyboard connected to the smartphone

2. Double Enter

3. If there is a pin insert it and push enter

4. Escape X 2 times to be sure to be at the Home screen

5. ALT+A

6. Up

7. Enter

8. Type: Smart View

9. Enter (and after wait 3 or 4 seconds)

10. Under X 3 times

11. TAB X 5 times (and after wait at least 5 seconds)

12. Enter

13. Under

14. Enter

15. Under

16. Enter

Now if anything goes well you should be connected to your smart tv (I tried with two different Samsung smart tv and it always worked. If you have problem follow the voice of the talkback to understand what are you doing and where you are in the system. Don't be discouraged if it don't work at the first three or four times, keep tring it since last.

Now that you are connected to the TV be sure to remove the PIN (if you have one) and to activate the developer option by clicking ot pressing Enter 7 time in the build version.

This article is property of PC Wizard wroted by Michele (Italy). Please don't copy and paste without mentioning the blog and the author.

Here I leave to you some useful shortcut by keyboard working on the Samsung Galaxy A7 (2018) SM-A750FN:

WIN+N short notification dropdown

WIN+Q notification dropdown

WIN+? shortcut display

WIN+D home screen

WIN+V show volume bar

I advice you that other smartphone can have more shortcut by keyboard. For example I tried the WIN+Y on a Samsung Galaxy S10 and Samsung Galaxy A40 and it opened directly the Smart View menu but this shortcut doesn't work on the Samsung Galaxy A7 2018. Another option worked on this Android 11 smartphones was WIN+U that opened directly the Accessibility menu but it doesn't work on the Samsung Galaxy A7 2018 too.


This article is property of PC Wizard wroted by Michele (Italy). Please don't copy and paste without mentioning the blog and the author.

If you wanna help me donate here: https://www.paypal.com/donate?business=AUDLXGNQV6FAA&no_recurring=0&item_name=sostegno+del+blog+PC+Wizard&currency_code=EUR 

ore use the QR code: