venerdì 17 giugno 2022

BackgoundTaskHost continua a riavviarsi (backgroundTaskHost reboot itself)

Dopo l'ultimo update di giugno 2022 di Windows 10 (KB5014699) ho notato tramite Process Explorer che il servizio backgroundTaskHost continua a riavviarsi e ad ogni chiusura il Werfault si avvia per segnalare l'errore in un ciclo senza fine.

Cercando online il servizio backgroundTaskhost viene identificato come appartenente a "Cortana" ma nonostante io abbia disattivato l'attivazione di Cortana tramite voce il problema non si è risolto. Guardando la descrizione della Command Line (vedi screenshot sopra) il servizio in questione è generato da "MicrosoftOfficeHub" e quindi per eliminare la problematica ho proceduto tramite Powershell a rimuovere il pacchetto integrato Microsoft (senza che l'installazione di Office sul mio pc fosse corrotta):

get-appxpackage|?{$_.packagefullname-like'*MicrosoftOfficeHub*'}|remove-appxpackage

Inoltre ho proceduto anche con la disintallazione tramite Powershell con prilivegi da amministratore della funzione YourPhone (che io non utilizzo) integrata in Windows 10 tramite il seguente codice:

 Get-AppxPackage Microsoft.YourPhone -AllUsers | Remove-AppxPackage
e qualora voleste controllare tutta la lista delle applicazioni preinstallate in Windows 10 basterà lanciare:

Get-AppxProvisionedPackage -Online | format-Table DisplayName, PackageName


Fonti (sources):
Faulting Application backgroundtaskhost 

Elenco di tutte le app di cui è stato effettuato il provisioning

Remove Click-To-Run Office (MS Store version) (and other crap) From New PCs

This article is property of PC Wizard wroted by Michele (Italy). Please don't copy and paste without mentioning the blog and the author.
or use the QR code:
QR code 


sabato 21 maggio 2022

Synaptics Touchpad: problema con la barra di scorrimento laterale

Con l'update auomatico del driver di Windows Update il TouchPad Synaptics dei PC HP (in particolare nel mio caso un HP Pavilion DV8 1010el) funziona parzialmente e la barra laterale di scorrimento delle pagine posta sul lato destro del ToucPad smette di funzionare ed inoltre l'icona nel tray di sistema non mostra il tocco.

 Il driver "più recente" che non presenta questo problema è quello HP SP45019 (Version 13.2.4.12) che viene sostituito da Windows Update ma perdendo le funzionalità descritte sopra.

Una volta disinstallato il driver malfunzionante ed aver installato il driver funzionante HP dobbiamo assicurarci che Windows Update non vada di nuovo a sostituirlo con il driver successivo che presenta il problema. La procedura da seguire è la seguente:


Dopo aver disinstallato il driver di Windows Update riavviare il sistema disattivando la connessione internet e reinstallare il driver Synaptics di HP (che permette di utilizzare la scroll bar laterale a differenza di quello di Windows Update).

- Poi vai su:

Gestione dispositivi -> Mouse e altri dispositivi di puntamento -> Synaptics PS/2 Port TouchPad -> Proprietà -> Dettagli -> ID hardware

- copia le stringhe sotto "Valore", in questo caso:

ACPI\VEN_SYN&DEV_1E0F
ACPI\SYN1E0F
*SYN1E0F

- apri start e digita "gpedit.msc" e premi Invio.

- Nella finestra Criteri di gruppo, nel riquadro a sinistra, visualizza in dettaglio Configurazione computer> Modelli amministrativi> Sistema> Installazione dispositivo> Restrizioni di installazione dispositivo. Sulla destra, trova l'elemento "Impedisci l'installazione di dispositivi che corrispondono a uno di questi ID" e fai doppio clic su di esso.
- Poi fai click su "Attivata"
- Poi clicca su "Mostra" ed inserisci i tre ID copiati sopra e dai l'ok.
- Applica e dai ok

- Adesso Windows non potrà più aggiornare questo driver

Se Windows Update cerca di installare in continuazione (fallendo) questo driver potete seguire questa guida:

- Per nascondere l'aggiornamento del driver in windows Update che fallirà ogni volta l'installazione scarica il tool wushowhide.diagcab

- avvia il tool
- clicca su Apply repairs automatically
- Next
- Hide updates
- seleziona Synaptics dalla lista e clicca su Next
- Close

This article is property of PC Wizard wroted by Michele (Italy). Please don't copy and paste without mentioning the blog and the author.
or use the QR code:
QR code 


martedì 8 febbraio 2022

Remap keyboard keys on Windows 10/11

Testing the MSI Prestige 15 I figured out that the keyboard is very uncomfortable compared to my previous one. The key that I miss the most is WIN MENU (usually between ALT GR and CTRL) that I use to open the Windows context menu working on system folders. Without this key I had to leave the keyboard and to use the touchpad to give a right click, and for me this is really annoying.


This keyboard has two CTRL so I decided to renounce to one of them (the right one) and to remap it with the WIN MENU. Online you can find some softwares that will perform the remapping of the keys in a much more intuitive way than the one we will see in this tutorial. If you, like me, are not a fan of third-party software and you prefer to make the changes by your own even if in a more spartan way as in the case we will examine, then follow this tutorial.

These are the steps to follow:

1. Open regedit and insert a new "binary key" renaming it "Scancode Map" in this path:

Computer\HKEY_LOCAL_MACHINE\SYSTEM\CurrentControlSet\Control\Keyboard Layout

(be careful not to confuse it with "Keyboard Layouts" otherwise the entered key will not work if you will insert it into the folder "Keyboard Layouts" instead of "Keyboard Layout")

2. Insert these values into the binary key created:

first row 00 00 00 00 00 00 00 00
second row 02 00 00 00 5D E0 1D E0
third row 00 00 00 00


"5D E0" represent the "WIN MENU" and "1D E0" represent the "Right CTRL". We will call Scancode Set the identifiers of the buttons (like the "5D E0").


If you wanna edit only one button you can stop here.
If you wanna edit another button replace the third row with the following (in my case I will change the "INS" button with the "END" button):

third row 02 00 00 00 4F E0 52 E0
fourth row 00 00 00 00
You can follow this tutorial to replace these two button keys with the buttons that you need referring to the jpg file "remap key table windows" attached below. As a clarification when you find the E0 parameter insert it after the Scancode Set and remember that these changes work within the operating system in which you have added the registry key (any other systems in dual boot or distro linux installed or already present in your machine will not be affected by these remaps).


The sources that helped me realizing this tutorial:

Keyboard key kills and remaps
Remap Keyboard Keys - No Third Party Software (Tutorial)
Youtube tutorial: Tech Tuesday - How To Remap Keys [No Third Party Software]

This article is property of PC Wizard wroted by Michele (Italy). Please don't copy and paste without mentioning the blog and the author.

or use the QR code:
QR code 


Come rimappare i pulsanti della tastiera su Windows 10/11

Testando il nuovo MSI Prestige 15 mi sono ritrovato con una tastiera molto scomoda rispetto alla mia tastiera precedente. Il pulsante che mi manca molto è il WIN MENU (quello posto spesso tra i pulsanti ALT GR e CTRL) che utilizzo per aprire il menù contestuale di Windows quando eseguo operazioni tra le cartelle. In sua mancanza sono costretto a passare dalla tastiera al touchpad per premere il tasto destro del mouse.


Avendo questa tastiera due tasti CTRL ho deciso di rinunciare a quello posto sulla destra e rimapparlo con la funzione del WIN MENU. In rete potete trovare dei software che in maniera molto più intuitiva rispetto a quella che vedremo in questa guida eseguiranno la rimappatura dei tasti. Se anche voi come me non siete amanti dei software di terze parti e preferite eseguire le modifiche manualmente anche se in maniera più spartana come per il caso che prenderemo in esame allora seguite questa guida.

Riporto nel seguito la procedura da seguire:

1. Aprire regedit e inserire una nuova "chiave binaria" dandole nome "Scancode Map" nel percorso:

Computer\HKEY_LOCAL_MACHINE\SYSTEM\CurrentControlSet\Control\Keyboard Layout

(attenzione a non confonderla con "Keyboard Layouts" altrimenti la chiave inserita non funzionerà se inserita nella cartella "Keyboard Layouts" invece che "Keyboard Layout")

2. Inserire i seguenti valori all'interno della chiave binaria creata:

prima riga 00 00 00 00 00 00 00 00
seconda riga 02 00 00 00 5D E0 1D E0
terza riga 00 00 00 00


"5D E0" rappresenta il "WIN MENU" e "1D E0" rappresenta il "CTRL destro". Chiameremo i parametri che indicano i pulsanti (ad esempio "5D E0") Scancode Set nel proseguio.


Potete fermarvi qui se volete modificare un solo pulsante.
Se volete modificarne altri sostituite la terza riga con questa (nel mio caso sostituisco "INS" con "FINE"):

terza riga 02 00 00 00 4F E0 52 E0
quarta riga 00 00 00 00
Potete seguire questa guida e sostituire questi due pulsanti con quelli che volete consultando il file jpg "remap key table windows" allegato. Come precisazione quando troverete il parametro E0 inseritelo sempre dopo lo Scancode Set e ricordate che queste modifiche funzionano all'interno del sistema operativo nel quale avete aggiunto la chiave di registro (eventuali sistemi in dual boot o distro linux installate o già presenti nella vostra macchina non saranno influenzate da queste rimappature).


Guide seguite a supporto:

Keyboard key kills and remaps
Remap Keyboard Keys - No Third Party Software (Tutorial)
Youtube tutorial: Tech Tuesday - How To Remap Keys [No Third Party Software]

This article is property of PC Wizard wroted by Michele (Italy). Please don't copy and paste without mentioning the blog and the author.

or use the QR code:
QR code 


Xbox App reappearing on every reboot on Windows 10/11

In these days I trying an MSI Prestige 15 and I'm writing this tutorial because I noticed a small little problem that make me mad and I want to share it. I unpinned  several times the XBOX app from the Taskbar but every time I restart my laptop I find the shortcut again there. So with the steps that you will find below you can resolve this stupid little problem and remove definitely the app from the Windows 10/11 Taskbar.

Follow this steps:

1. open run and past this URL:

%userprofile%\AppData\Local\Microsoft\Windows\Shell\LayoutModification.xml
2. open with the notepad the file LayoutModification.xml and delete that string:

 <taskbar:UWA AppUserModelID="Microsoft.GamingApp_8wekyb3d8bbwe!Microsoft.Xbox.App" />

3. Save the edited file on the Desktop and replace the old one contained at the folder of the step 1. Before these make a backup of the old file to restore it if you will mess something in the editing of the file.

4. Remove the app from the taskbar for the last time and reboot you pc to check that the app will not show itself again on every reboot of Windows.

With this tutorial you can delete every other icon that reappears (after reboot) even if you already deleted it. To do it simply remove everything between <defaultlayout:TaskbarLayout> and </defaultlayout:TaskbarLayout>. You will find a string (to delete) that looks like this <taskbar:TaskbarPinList> through </taskbar:TaskbarPinList>


The source that I used to solve my problem were these:

randomly learned 

Xbox app will not stay off of Taskbar

This article is property of PC Wizard wroted by Michele (Italy). Please don't copy and paste without mentioning the blog and the author.

If you wanna help me donate here: https://www.paypal.com/donate?business=AUDLXGNQV6FAA&no_recurring=0&item_name=sostegno+del+blog+PC+Wizard&currency_code=EUR 

ore use the QR code:


Rimuovere l'applicazione XBOX che riappare sulla Taskbar di Windows 10/11 ad ogni riavvio

In questi giorni sto utilizzando un MSI Prestige 15 e scrivo questa guida per fornire una procedura che possa rimuovere in via definitiva il collegamento all'applicazione XBOX che riappare sulla Taskbar di Windows 10/11 ad ogni riavvio del PC anche se viene continuamente rimossa.

Per rimuovere definitivamente l'icona dalla taskbar i passaggi da eseguire sono questi:

1. aprire esegui ed incollare il seguente URL:

%userprofile%\AppData\Local\Microsoft\Windows\Shell\LayoutModification.xml
2. aprire il file LayoutModification.xml con il blocco note ed eliminare la seguente stringa:

 <taskbar:UWA AppUserModelID="Microsoft.GamingApp_8wekyb3d8bbwe!Microsoft.Xbox.App" />

3. Salvare il file sul Desktop e sostituire il vecchio file contenuto nella cartella aperta al punto 1. Per sicurezza fate un backup del vecchio file da ripristinare in caso qualcosa vada storto.

4. Rimuovere l'applicazione dalla taskbar per l'ultima volta e riavviare per controllare che il processo sia andato a buon fine e l'applicazione non ricompaia nuovamente all'avvio di Windows.

Con questa procedura è possibile rimuovere anche tutte le altre icone che ricompaiono automaticamente cancellando tutto ciò che trovate tra <defaultlayout:TaskbarLayout> e </defaultlayout:TaskbarLayout>. Troverete una stringa (da cancellare) simile a <taskbar:TaskbarPinList> che si conclude con </taskbar:TaskbarPinList>


Le fonti che mi sono state utili per eseguire la porcedura sopra menzionata sono queste:

randomly learned 

Xbox app will not stay off of Taskbar

This article is property of PC Wizard wroted by Michele (Italy). Please don't copy and paste without mentioning the blog and the author.

If you wanna help me donate here: https://www.paypal.com/donate?business=AUDLXGNQV6FAA&no_recurring=0&item_name=sostegno+del+blog+PC+Wizard&currency_code=EUR 

ore use the QR code:


giovedì 13 gennaio 2022

Execute python code directly from a raw link on Github

Like you have seen in the previous posts, in these days I'm working on a python script that can automatically download and calculate the numbers of the covid in Italy. 

I loaded this code to trinket so that anyone can try it in one click, but, I'm testing it and every time I made a fix I have to paste my code to a new trinket link and I have to upload it back to my blog.

To skip this step I thinked about to execute the code directly from the raw link of the script from my Github page.

I tryed severals code but the one that worked in my case was this:

# read the data from the URL and print it
import urllib.request
# open a connection to a URL using urllib
webUrl  = urllib.request.urlopen('https://raw.githubusercontent.com/Pymai73/bollettino_covid_giornaliero/main/bollettino_covid.py')

#get the result code and print it
#print ("result code: " + str(webUrl.getcode()))

# read the data from the URL and print it
data = webUrl.read()
exec(data)

You can edit the "exec" with a "print" if you don't want to run the code but you wanna only grab it. Make sure that the source of the code is reliable or preferable writed by you like in my case and remember always that you are executing code from an external source that can be changed from someone so be careful and do it also if your source is really reliable. I found the code above at guru99 website and like you can see I disabled with the # the code that get the confirm that the page have been founded and print it. If you need this confirm you can delete the # and reactivate the print ("result code: " + str(webUrl.getcode()))

If you wanna see the result you can take a look to the trinket frame here. The next time I will upload my code in my github Github page (Pymai73) the trinket frame will execute directly the new code without any manual update.

An alternative way with the urllib.request I founded at stackoverflow to retrieve all the code in a raw file uploaded online was this one:

# read the data from the URL and print it
#
import urllib.request

url = "https://raw.githubusercontent.com/Pymai73/bollettino_covid_giornaliero/main/bollettino_covid.py"
file = urllib.request.urlopen(url)

for line in file:
    decoded_line = line.decode("utf-8")
    print(decoded_line)

In this case the code will be printed to screen line by line but I haven't find a way to execute It directly because of some errors. I have to analize better the traceback. If someone have some idea how to edit this second code to execute it directly like the first one I will appreciate if you let me know in the comment section below.

This article is property of PC Wizard wroted by Michele (Italy). Please don't copy and paste without mentioning the blog and the author.

If you wanna help me donate here: https://www.paypal.com/donate?business=AUDLXGNQV6FAA&no_recurring=0&item_name=sostegno+del+blog+PC+Wizard&currency_code=EUR 

ore use the QR code:


lunedì 10 gennaio 2022

Riepilogo Bollettino Covid Regionale e Nazionale zona Italia

Riepilogo bollettino covid giornaliero regionale e nazionale per la zona Italia


Il programma per il riepilogo dei dati regionali ricalca il funzionamento del codice dei dati nazionali visto nel precedente post del 2 gennaio 2022

Prende il file CSV con tutti i dati regionali del giorno corrente, tramite pandas crea un dataframe, chiede all'utente quale regione scegliere e crea un nuovo dataframe con i soli dati della regione scelta per permettergli di estrarre i vari riferimenti di colonna (esempio: nuovi positivi). Il nome della regione inserito dall'utente viene fatto corrispondere al nome completo anche se digitato in maniera incompleta o solo per iniziale (esempio Giulia -> diventerà Friuli Venezia Giulia, P -> diventerà Piemonte, in caso di iniziali uguali per più regioni restituirà la prima regione con quella iniziale: M -> diventerà Marche). Se il nome della regione non viene trovato il programma lo segnala e chiede se si vogliono consultare i dati nazionali. Restituisce come risultati finali: nuovi positivi, numero tamponi, tasso di positività, ingressi in terapia intensiva e decessi. Questi dati vengono calcolati prevalentemente come differenze con il giorno precedente (tramite un secondo dataframe della regione prescelta creato senza intervento dell'utente).

I dati di partenza, come ricordato nel primo post sull'argomento, sono quelli ufficiali pubblicati dal repository del Dipartimento della Protezione civile. Il file aggiornerà i dati secondo gli orari pubblicati nella pagina sopra menzionata.

Ricordo che trovate la skill per Alexa per testarla in modalità dev nella mia pagina Github: Pymai73

Potete inserire l'output nel vostro sito tramite questo codice:

<iframe src="https://trinket.io/embed/python3/31d63d6ecd?outputOnly=true&runOption=run&start=result" width="100%" height="356" frameborder="0" marginwidth="0" marginheight="0" allowfullscreen></iframe>

 Per aggiornare i dati potete aggiornare la pagina premendo F5 oppure il tasto run sul frame Trinket.

Potete seguire il progetto nella mia pagina Github per futuri aggiornamenti: Pymai73

martedì 4 gennaio 2022

Create an Alexa Skill that will report the daily numbers of the covid in Italy


After the creation of the python script i decided to create an Alexa skill that can read to me the small report with the numers of the covid in Italy. The skill returns:   

  • the number of new positives,
  • the total number of swab test of the day,
  • the rate of positivity,
  •  new entrants to the hospital and
  • the numbers of deaths.

I haven't find any good skill that can do it so I decided to create it by myself. Like with the python script the data are those officials provided by the repository of Dipartimento della Protezione civile. The skill will update the data according to the data update of this department.

For the creation of the skill I used this tutorial youtube and I used the inventiveness to compile the rest.

To activate the skill you should say (the instruction are in Italy in my case):
Alexa, bollettino covid
or
Alexa, apri bollettino covid
or
Alexa, chiedi a bollettino covid il numero di tamponi

These are the main step to create the skill:

01. Open the website developer Amazon
02. Skill Builders
03. Develop your Skill
04. Create Skill
05. Custom


06. Alexa-hosted (Python)

07. Start from Scratch

08. Continue with template
09. Interaction Model -> Intents
10. Add Intent
11. Add all the Intents you need. Save Models

12. Repeat the process for the new positives, swab tests, decease, new entrants at the hospital and the rate of positivity
 

13. Build Model
14. Go to the "code" sheet

15. To insert the Intent we should copy and paste those already present in the pre build model (for example copy the "HelpIntentHandler" and edit it with the intent created by us in the "Build" sheet. I activated the ask function that will ask to the user if he want to know other data. If he will not respond the skill will terminate.


16. Add the "intenthandler" at the bottom of the page with the others "SkillBuilder" like in the image below


17. I pasted the python code of my script edited deleting all the prints (you can find the code on github Pymay73) and I have lightened the code

18. I competed the file "requirements.txt" inserting only pandas  because I discovered that all the other library used in my python code were natively included in the lambda function. For any libraries that aren't natively included in lambda you will need to populate "requirements.txt". For a list of libraries that are natively included please see: here

19. Test the code in the "Test" sheet

20. To make other changes you have to turn back to "Code" e "Build" sheets if you want to edit the Intents, the Slots or the Invocation phrase.

When you will switch from "Test" to "Code", for example, you will receive many times the "Scheduled Manteinance" message and you have to wait patiently for one minute before the page to be refreshable and to be able to edit the code again. I think this is a bug of the developer Amazon website. You will need a lot of patience.

These are the main steps. If you have more questions you can study the source code at my page on github Pymai73

This is a first version so it can be unstable and can not respond like you want sometimes. I accept advice in case of discovery of bugs.


Skill Alexa per avere il riepilogo del bollettino covid giornaliero italiano


Dopo la creazione dello script python ho deciso di cimentarmi nella creazione di una skill per Alexa che mi leggesse il piccolo report giornaliero con tutti i numeri del covid in Italia. La skill restituisce:

  • il numero di nuovi positivi,
  • il numero di tamponi totali della giornata,
  • il tasso di positività,
  • i nuovi ingressi in terapia intensiva e
  • il numero decessi.

Non avendo trovato alcuna skill che proponeva questi dati ho deciso di provare per la prima volta a scrivere la skill. Come per il file python anche i dati da cui parte la skill sono sono quelli ufficiali pubblicati dal repository del Dipartimento della Protezione civile. La skill aggiornerà i dati secondo gli orari pubblicati nella pagina sopra menzionata.

Per la creazione della skill ho utilizzato un tutorial youtube e dove non ho trovato nulla ho semplicemente ragionato fino a trovare una soluzione funzionante. 

Per attivare la skill basta dire:
Alexa, bollettino covid
oppure
Alexa, apri bollettino covid
oppure
Alexa, chiedi a bollettino covid il numero di tamponi

Ripropongo nel seguito i principali step della creazione della skill:

01. Aprite il sito developer Amazon
02. Skill Builders
03. Sviluppa la tua Skill
04. Crea Skill
05. Custom

06. Alexa-hosted (Python)

07. Start from Scratch

08. Continue with template
09. Interaction Model -> Intents
10. Add Intent
11. Aggiungo gli Intents. Save Models

12. Ho ripetuto il processo per i nuovi positivi, tamponi, deceduti, ospedalizzazioni e tasso di positività
 

13. Build Model
14. Andiamo su "code"

15. Per inserire gli Intent copiamo e incolliamo quelli già presenti (ad esempio copiamo quello del "HelpIntentHandler" e modifichiamolo secondo gli intent da noi specificati nella scheda "Build". Io ho attivato la funzione ask che chiederà all'utente se vuole sapere altri dati. Se l'utente non risponderà la skill terminerà

16. Aggiungi "intenthandler" a fondo pagina con gli altri "SkillBuilder"


17. Ho incollato il codice python dello script modificato cancellando i print (trovate il codice su github Pymay73) e l'ho modificando alleggerendolo un poco

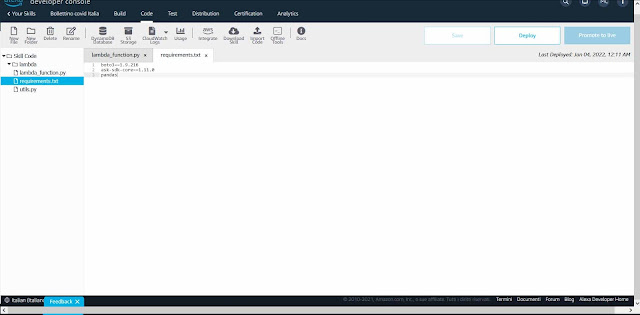
18. Ho completato il file "requirements.txt" inserendo solo pandas perché ho scoperto che le altre librerie da me usate nel codice python erano già nativamente incluse nel lambda function. Per tutte le librerie non nativamente incluse nel lambda dovrete popolare il file "requirements.txt". Per conoscere la lista delle librerie nativamente incluse potete vedere qui

19. Testiamo il codice sulla scheda "Test"

20. Per effettuare modifiche torniamo alla scheda "Code" e "Build" se le modifiche riguardano gli Intent, gli Slot o la parola di invocazione.

Quando cambierete la scheda da "Test" a "Code" ad esempio riceverete molto spesso il messaggio "Scheduled Manteinance" e dovrete attendere circa un minuto prima di rifreshare la pagina e poter riprendere con le modifiche al codice. Purtroppo è da parecchio che riscontro questo bug nel sito dei devoloper amazon. Quindi dovrete avere pazienza.

Questi sono gli step principali. Se avete dubbi potete consultare il codice sorgente sulla mia pagina github Pymay73

Essendo una prima versione potrebbe non funzionare sempre a dovere e accetto consigli in caso di scoperta di bug.


domenica 2 gennaio 2022

Riepilogo Bollettino Covid Giornaliero scritto in Python

Riepilogo bollettino covid giornaliero per la zona Italia

Esordisco dicendo che non sono un grande esperto di python ma ho deciso di condividere questo semplice programma che eseguito giornalmente restituisce il numero di nuovi positivi, il numero di tamponi totali della giornata e il tasso di positività. L'ho creato perché da molti mesi cercavo giornalmente questi tre dati sul web e così ho deciso di automatizzare e semplificare la consultazione.

I dati di partenza sono quelli ufficiali pubblicati dal repository del Dipartimento della Protezione civile. Il file aggiornerà i dati secondo gli orari pubblicati nella pagina sopra menzionata.

Ho iniziato questo percorso con la speranza di poter creare una skill per Alexa che possa leggere l'output delle ultime tre righe del codice: nuovi casi, tamponi, tasso di positività ma non essendo un grande esperto e non avendo trovato una guida nemmeno in lingua inglese che possa aiutarmi step by step nella creazione, spero qualcuno con le competenze giuste voglia darmi qualche suggerimento o qualche guida da seguire.

Potete inserire l'output nel vostro sito tramite questo codice:

<iframe src="https://trinket.io/embed/python3/31638994ed?outputOnly=true&runOption=run&start=result" width="100%" height="356" frameborder="0" marginwidth="0" marginheight="0" allowfullscreen></iframe>

 Per aggiornare i dati potete aggiornare la pagina premendo F5 oppure il tasto run sul frame Trinket.

Potete seguire il progetto nella mia pagina Github: Pymai73